
Last Updated on November, 2023 by Edison
Would you like to create a beautiful website without coding and paying someone thousands of dollars?
If you said yes, then this article is for you.
I will teach you everything you need to know about building a website from scratch.
Why Cloudways?
I used to recommend Siteground hosting. It’s a pretty good option; I have never had issues with them.
But I have switched to Cloudways because:
– It offers high-performance servers at a much lower cost.
SG offers a shared server for $26, while Cloudways offers a dedicated server for only $12 monthly (for small sites). You can upgrade as your site grows.
– The site will load faster, and it helps pass the “Core Web Vitals” test.
– Customer support responds fast and is knowledgeable.
– It gives you the necessary tools to protect your site. [Free SSL; Firewall; 24/7 Monitoring; backups]
I will explain how to secure your site later.
– You can use the “Staging site” option to modify your site without affecting how it looks to your visitors as you work. Later in this guide, I will show you how to set it up.
– Host multiple sites on one server.
– You can migrate from any host very quickly.
Step #1 Setting Up Cloudways
Sign up for a free account on their site. You’ll get a three-day free trial.
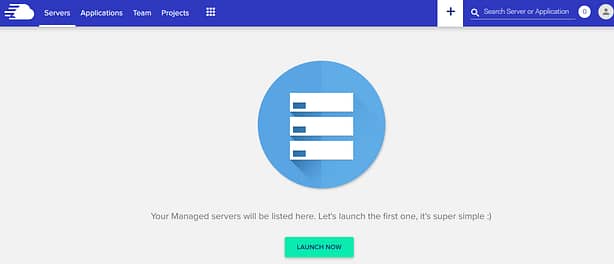
Navigate to the Server and click Launch Now.
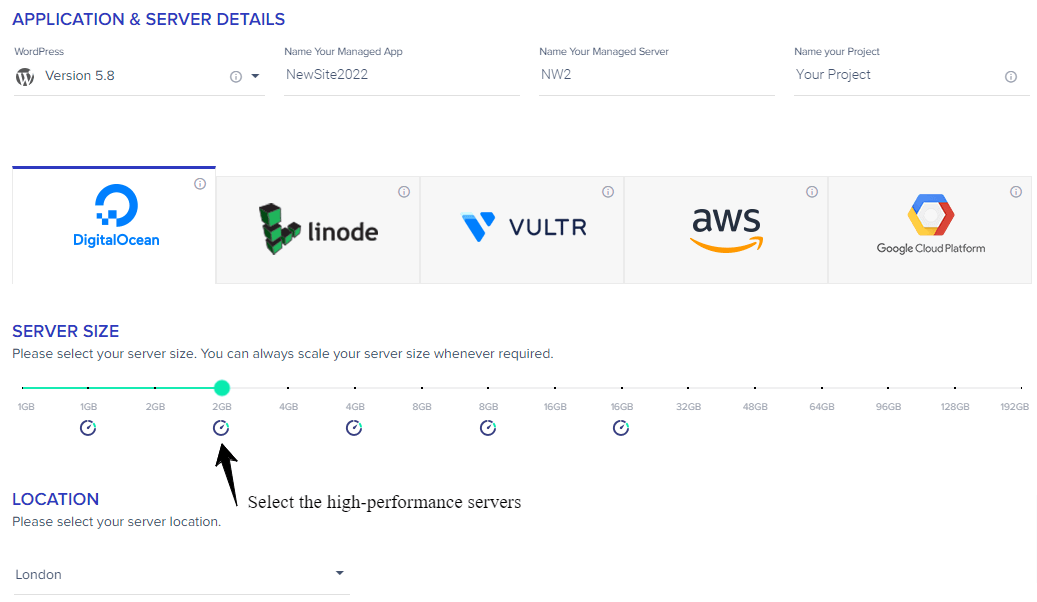
Select WordPress as your application (if you want to use WP).
Name the app that will become your site. Name the server in case you will add more sites in the future.
I recommend DigitalOcean Premium because it’s the best option.
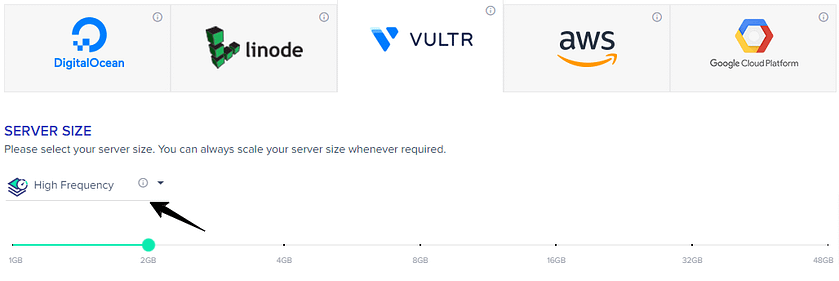
If you choose Vultr, make sure you select High Frequency.
About the amount of RAM…
1G [Premium] is enough for small sites.
2GB [Premium] is enough if your site traffic is under 50k visitors per month.
4G [Premium] if the traffic is 50k-200k visitors.
When choosing the server location, pick a place where most of your visitors come from.
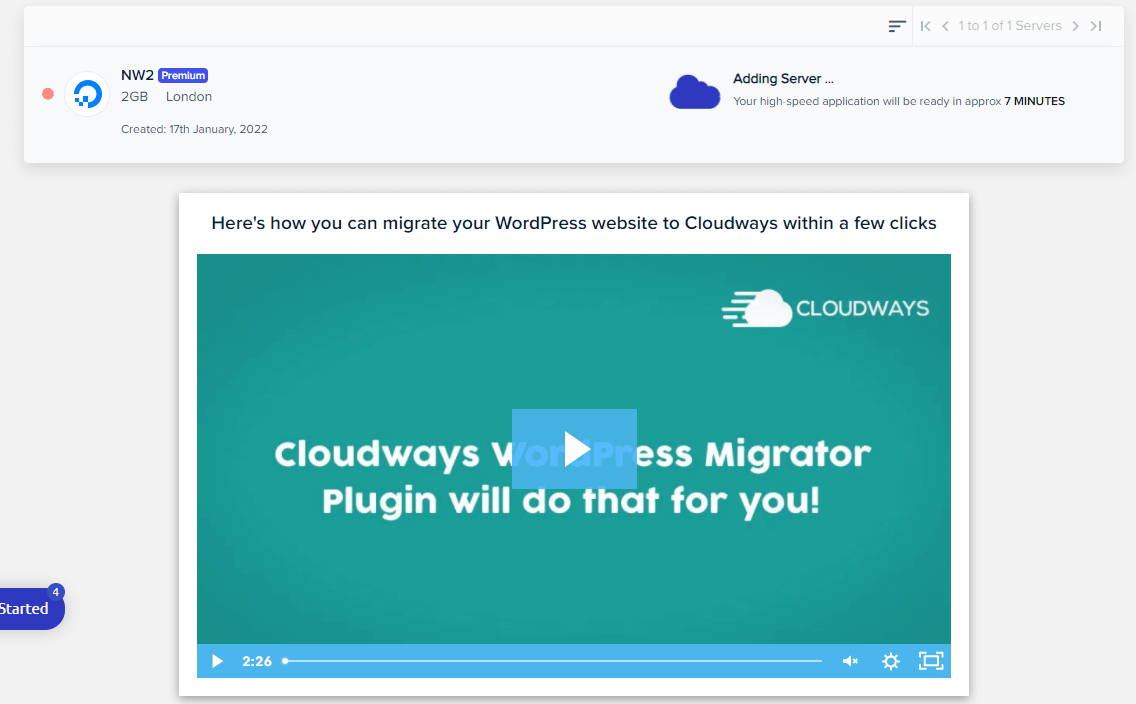
Click Launch Now and wait a few minutes till the server is created.
As you can see, a video shows you how to migrate to Cloudways step by step. It’s straightforward… all you need to do is install the Cloudways WordPress Migrator plugin. And then you follow the instructions.
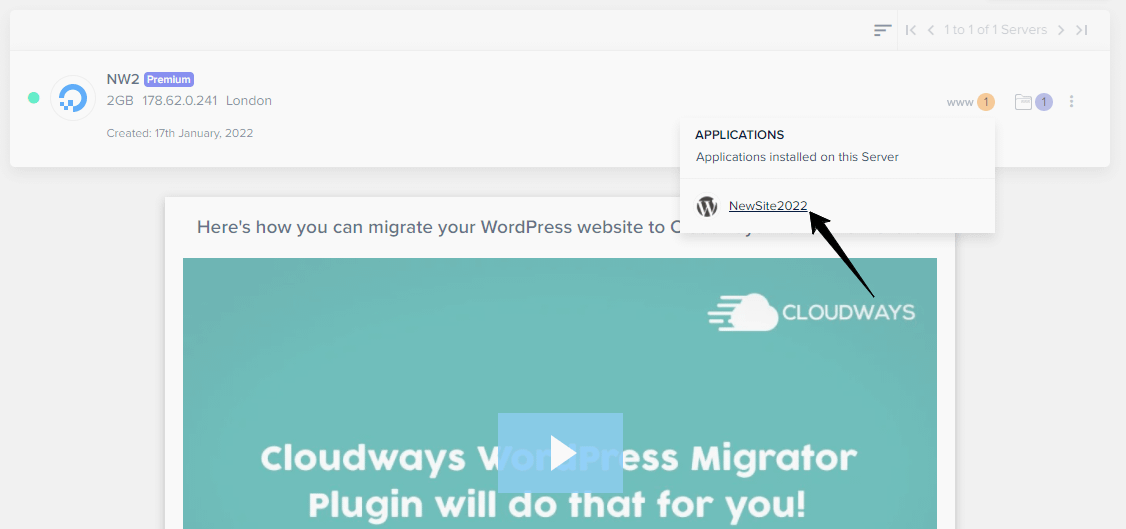
The server is up, and we need to click on www and see the server.
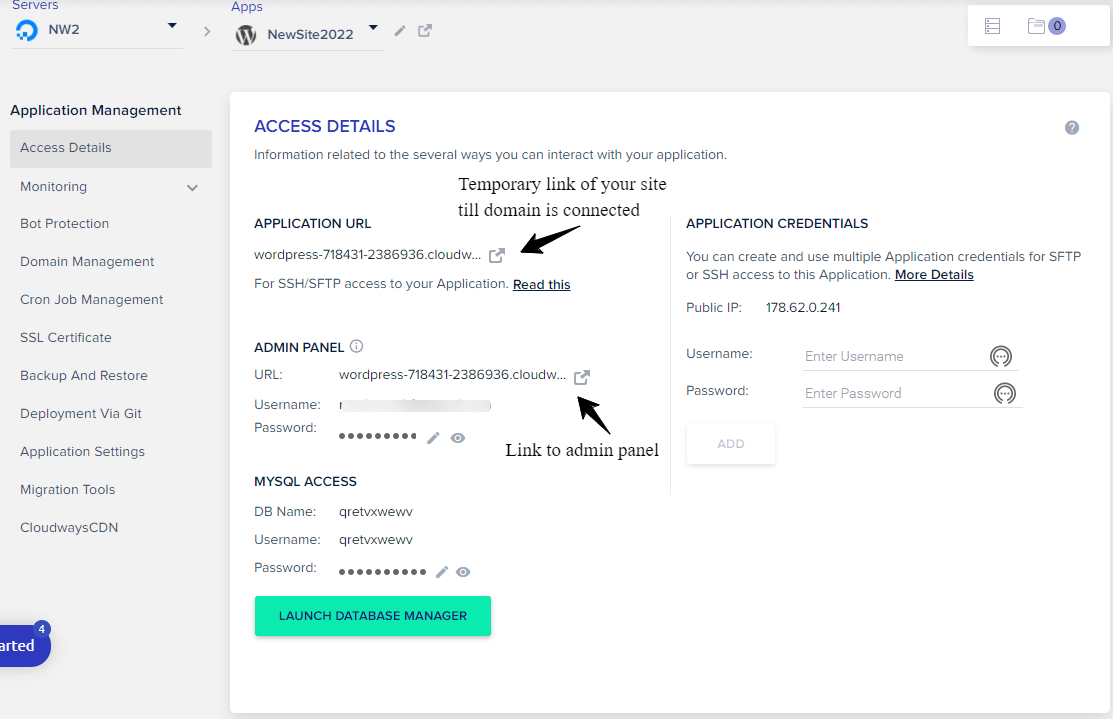
As you can see, you have a temporary link to your site at the Application URL.
But that’s going to change when we register our domain.
You have the link, username, and password in Admin Panel to log into WordPress.
At Application Credentials, you have the Public IP. Keep that in mind because we will need the IP in the next step.
Step #2 Domain and Name Servers
We must follow three simple steps to register a domain and point it to Cloudways.
1. We need to buy a domain name at a registrar like Namecheap, Godaddy, or Hostgator…
If you already have one, skip to the next step.
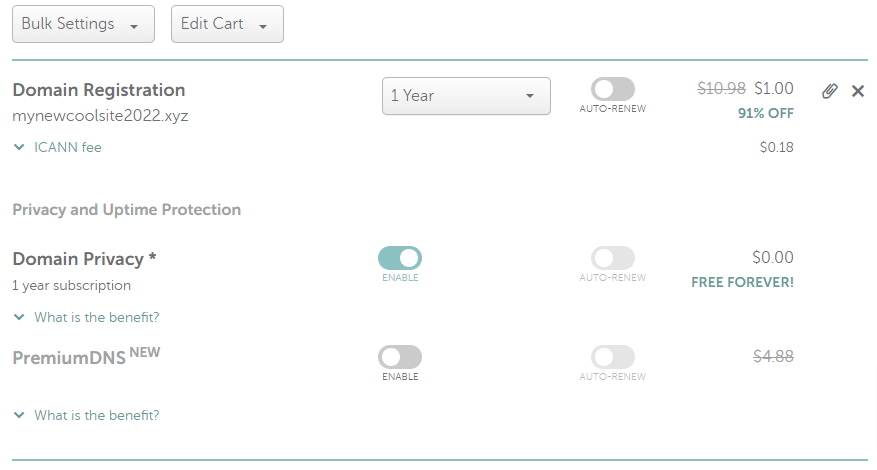
I went ahead and bought the mynewcoolsite2022.xyz domain just for this tutorial at Namecheap.
But I would recommend choosing a .com .net or .org extension because it’s easier to remember for visitors – as a result, it helps with SEO.
I like Namecheap because it gives you Domain Privacy for free. Meaning your info won’t show on the whois database.
After the purchase, check your email for a verification link by Namecheap.
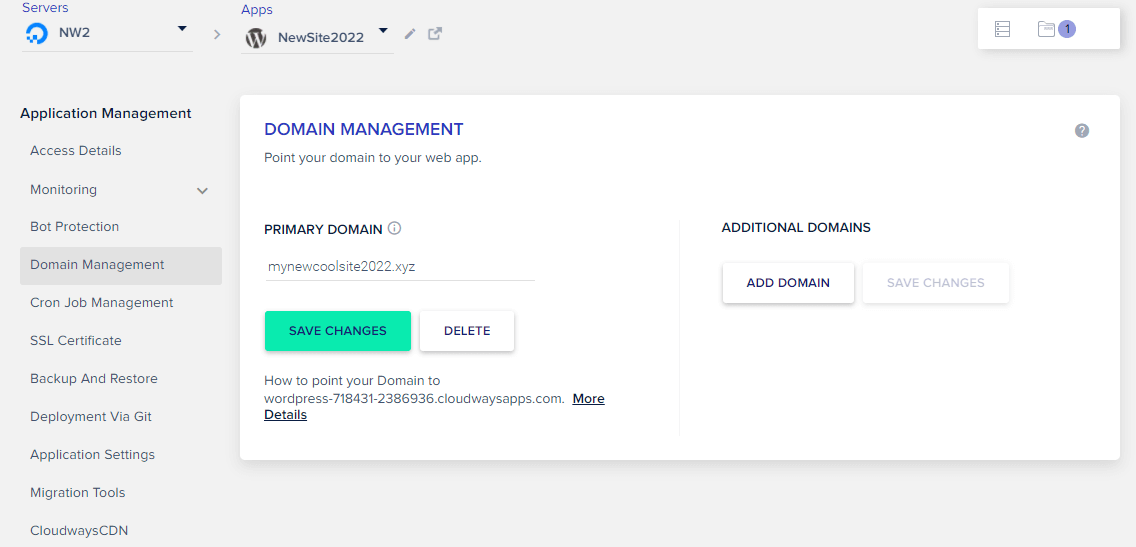
2. We set our domain on Cloudways. Go to Domain Management and enter the domain name.
3. Now, we need to set up Cloudflare CDN
Cloudflare dramatically increases website speed and protects it from DoS attacks.
The best part is that you can get these benefits with the free plan.
So,
– Sign up at Cloudflare
– Enter the domain of your site
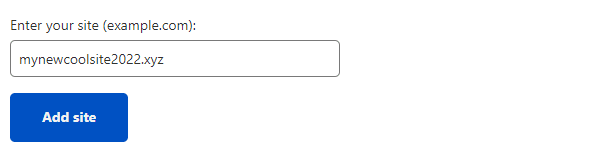
– Choose the Free Plan
– Wait for the DNS records to show up and click continue. We are going to configure them later.
– Cloudflare has given us the nameservers for our domain.
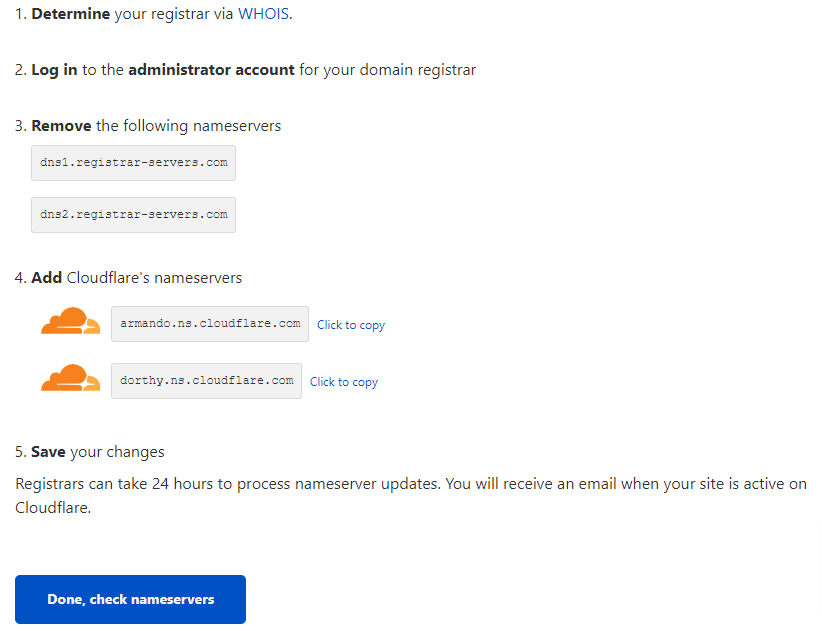
And we need to update our nameservers with the Cloudflare nameservers.
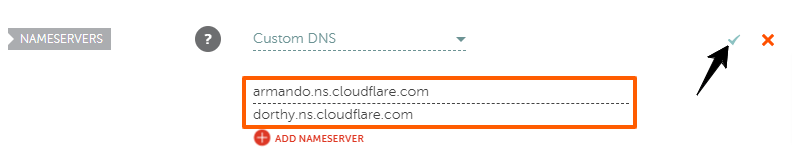
We’ll go to Namecheap –> Domain List –> Custom DNS
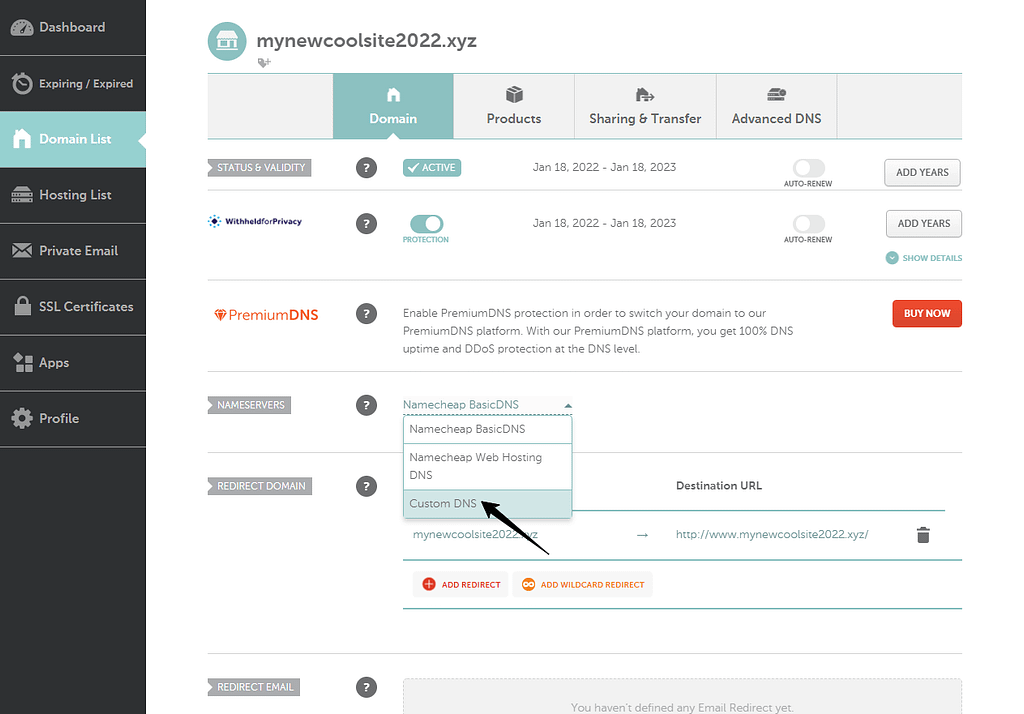
And we’ll enter the Cloudflare nameservers. And check the mark on the right.
We’ll check the name servers at Cloudflare.
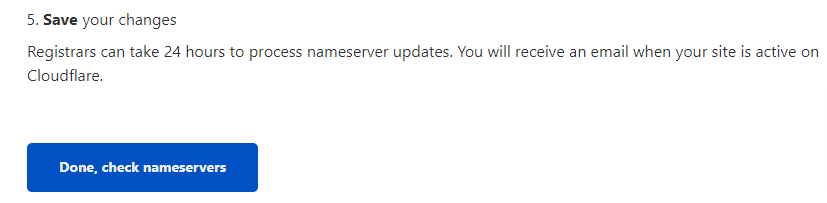
It will take a few minutes, and you will see that the name servers are updated when the site is active.

Now we will set up the DNS records.
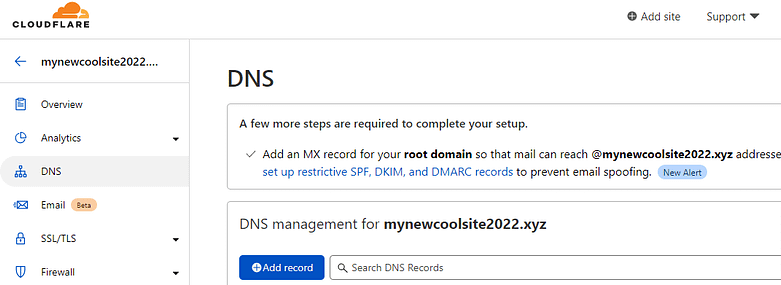
First, delete all the existing records by clicking “Edit” on the right and “Delete”.
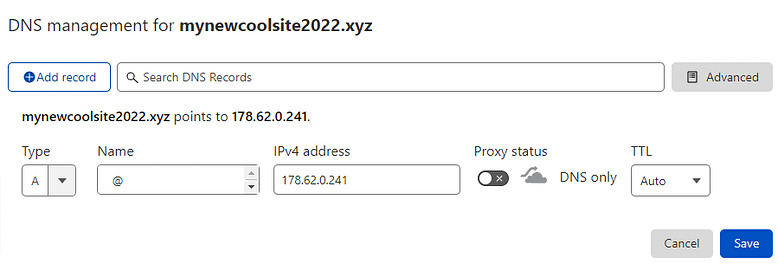
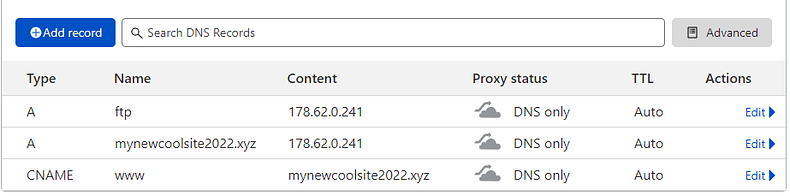
Click Add record as shown below and insert…
A | @ | IP Address of Cloudways | Disable Proxy | Auto
Note: You can find the IP address of Cloudways at “Access Details”; “Public IP”.
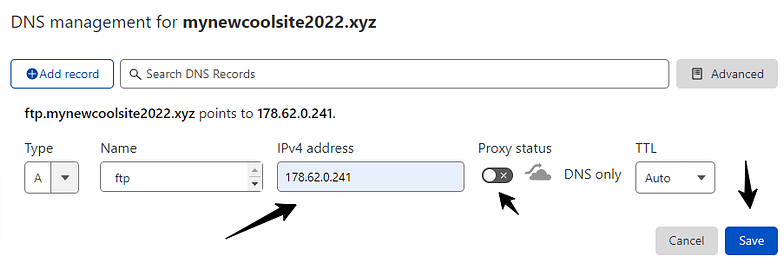
Click Add record once again and insert…
A | ftp | IP Address of Cloudways | Disable Proxy | Auto
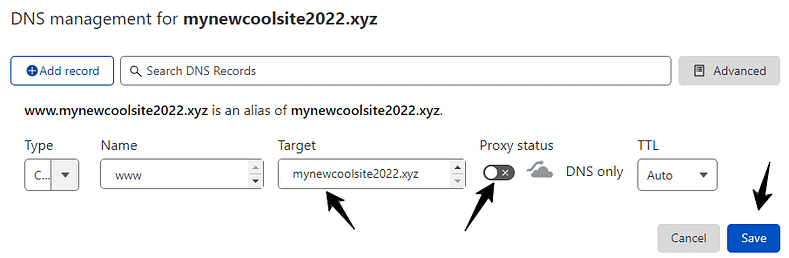
Click Add Record one more time and…
Choose CNAME | www | domain name | Disable Proxy | Auto
We have set up the Cloudflare CDN. The most boring part is over.
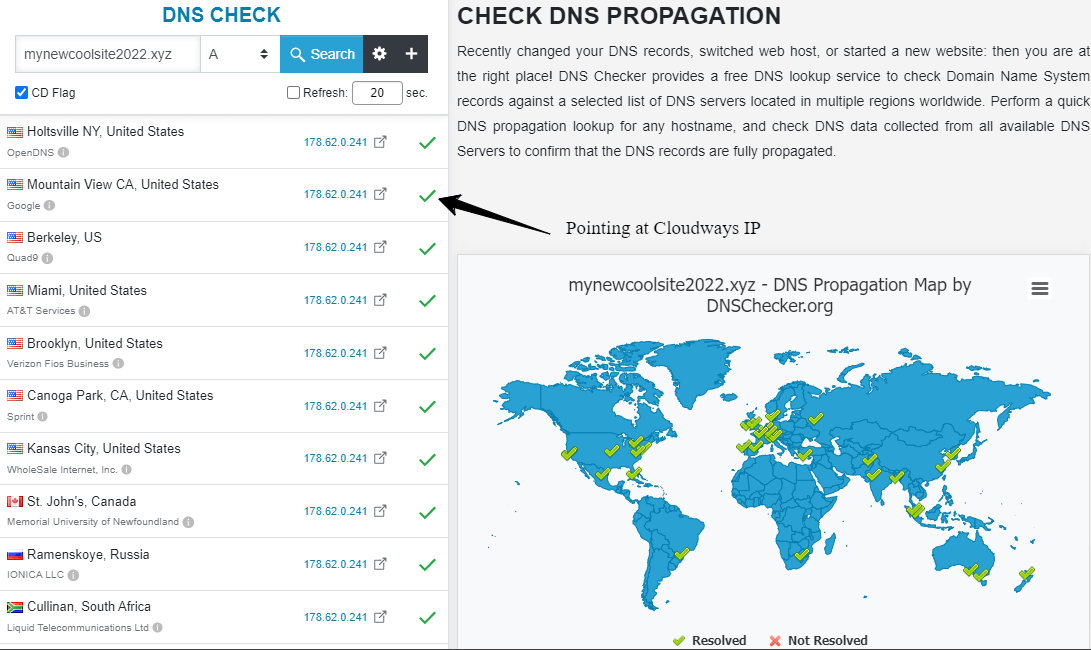
Another thing I want to add is that it will take 24-48 hours for the changes to propagate. You can check if your domain is pointing to Cloudways servers at DnsChecker.
For this site, it took almost 24 hours.
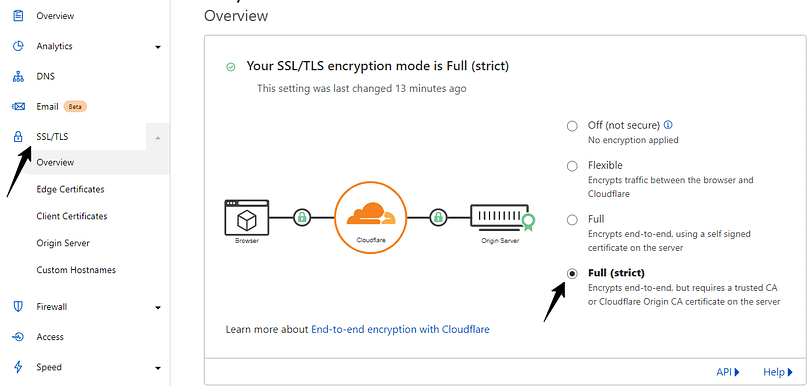
Since we are at Cloudflare, enable Full (Strict) SSL.
Step #3 Install the SSL Certificate
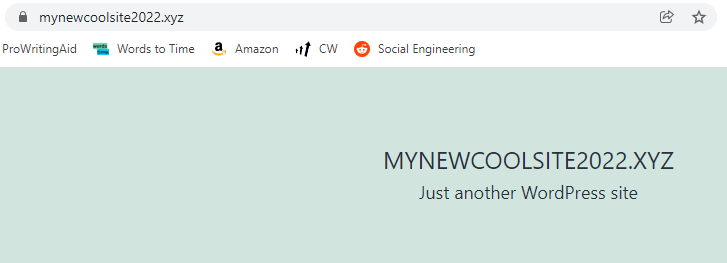
If you encounter any issue during this process (DNS, SSL), don’t hesitate to contact support, and they’ll help you solve it. And here’s our website looks. SSL is working.
Step #4 Log in to WordPress
As you can see in the image below, Admin Panel URL has changed.
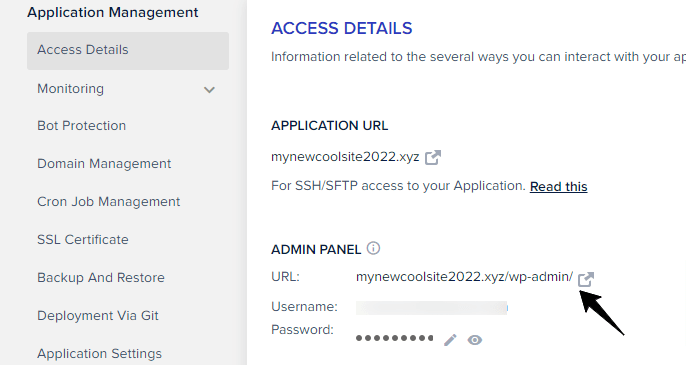
And we will use those details to log into our WordPress Dashboard.
Once you are in, you can do some little things to improve your site.
Head over to Settings –> General and make the necessary changes… The tagline of your site, Time Zone, and Administrator email address.
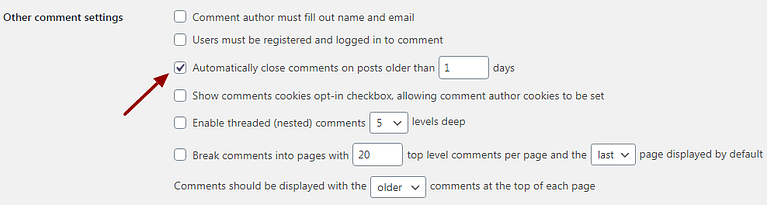
If you want to disable comments, go to Discussion.
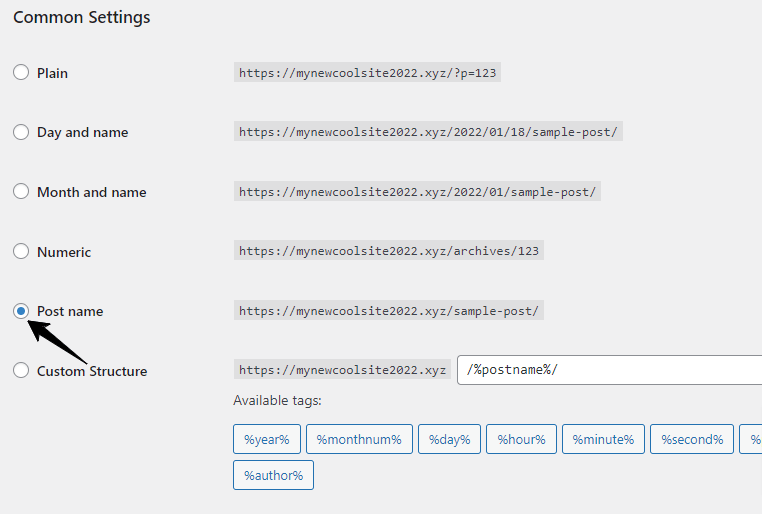
It is suitable for SEO if you make your page URLs simple. If it is hard for a human to understand the URL, search engines will also find it hard.
Change your password
You can change that complicated password and set a new one.
1. Go to Users – All users
2. Click on your username
3. Scroll down to the end of the section and click generate password button
4. Add a strong password – Use this tool to generate a strong password.
5. Update profile
Step #5 Choose a Theme
I highly recommend installing a lightweight theme because it greatly affects the site loading speed.
Read this article by wp-rocket in case you haven’t chosen a theme yet.
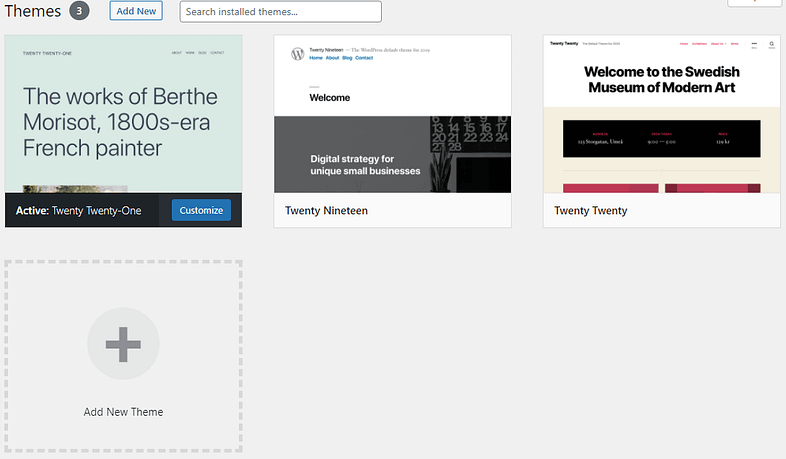
How to add a theme?
On the left of the WP Dashboard, go to Appearance – Themes.

Delete all the current themes.
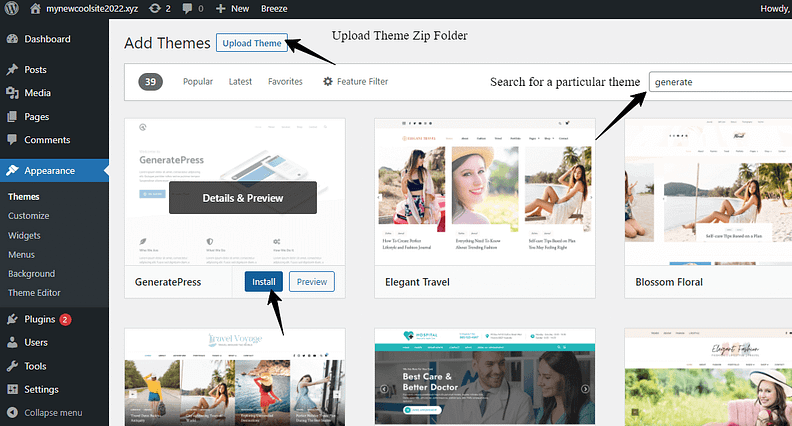
You can upload the zip folder of the chosen themes from other sites.
Or you can search for themes in WP and install&Activate them from there.
Step #6 Install plugins
In this section, I’ll show you the best plugins and set the correct settings.
It will save you a great deal of time.
Go to Plugins –> Ad New –> insert the plugin’s name –> Install now –> Activate.
Google Site Kit – It’s the easiest way to connect your site with Google Search Console and Google Analytics.

Once activated, you’ll see a banner asking you to start setup, Sign in with your Gmail account, and follow the steps.
I recommend using the same Gmail for GSC, GA, and later Google Adsense.

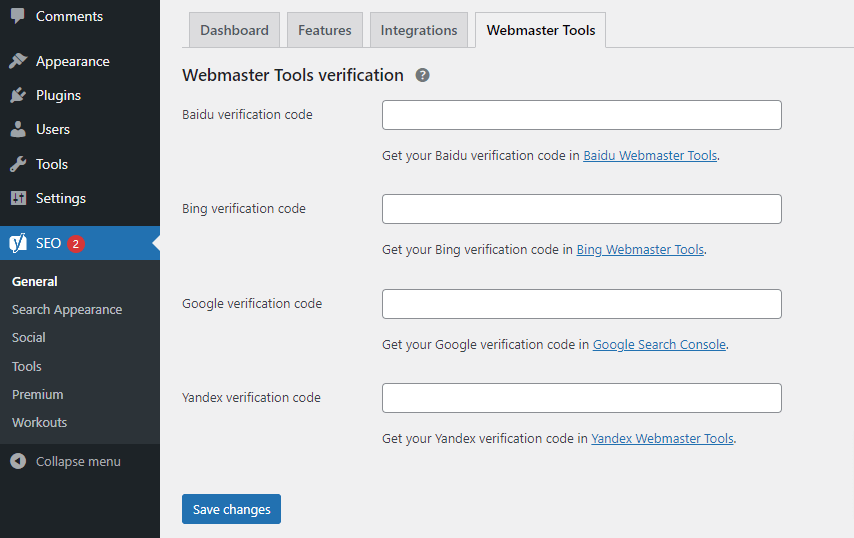
Yoast SEO – It is the complete SEO plugin. It helps improve your organic search because it is based on the ranking factors by Google.
General Settings:
Leave Features settings as they are. Just make sure that XML Sitemap is ON.
At Webmaster tools, It would help if you connected Yoast SEO with popular search engines.
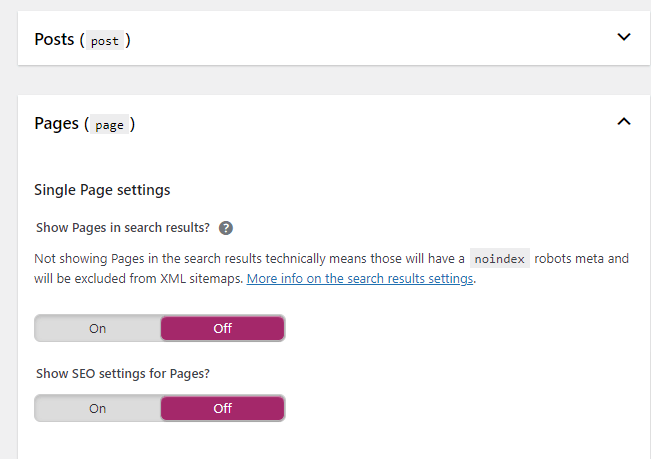
Let’s move on to Search Appearance:
– I would recommend that you don’t show Pages in search results.
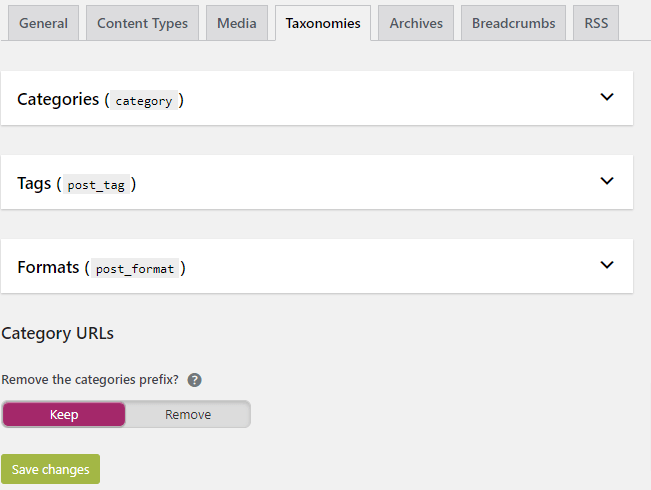
Taxonomies – Check OFF the Categories, Tags, and Formats.
Same thing with Archives.
Breeze – It’s the plugin that’s automatically added by Cloudways. It will help your site load faster.
Basic Options
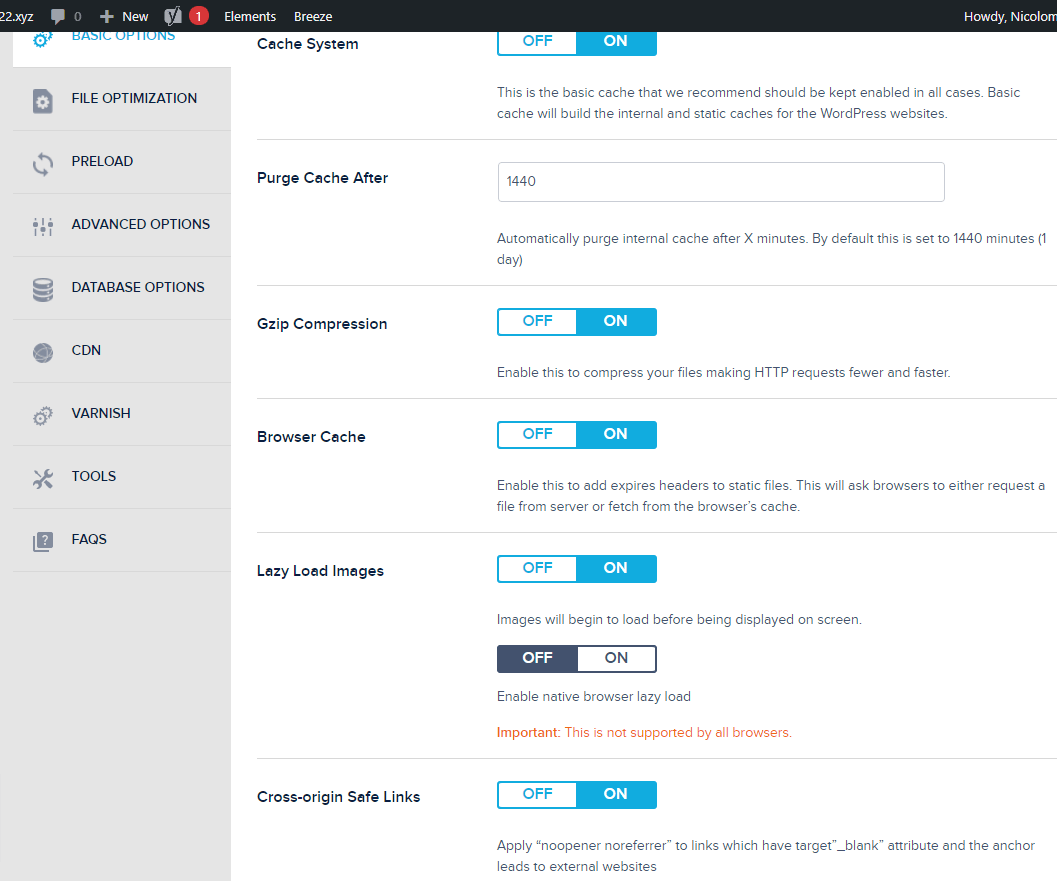
File Optimization
Back up your site before enabling these options. And see if everything is okay with your site.
- HTML Minify – ON
- CSS Minify – ON
- Include inline CSS – ON
- Combine CSS – OFF
- JS Minify – ON
- Combine JS – OFF
- Include Inline JS – ON
- Delay Inline JS Scripts – OFF
Check the website to see if everything is okay.
Preload –> Preload Links – ON
Advanced Options –> Disable Emojis – ON
A better alternative to Breeze is WP Rocket, but it’s a paid plugin.
Bot Protection plugin is another plugin automatically added by Cloudways. This plugin will monitor your site for malware and remove it. No action is needed on your part.
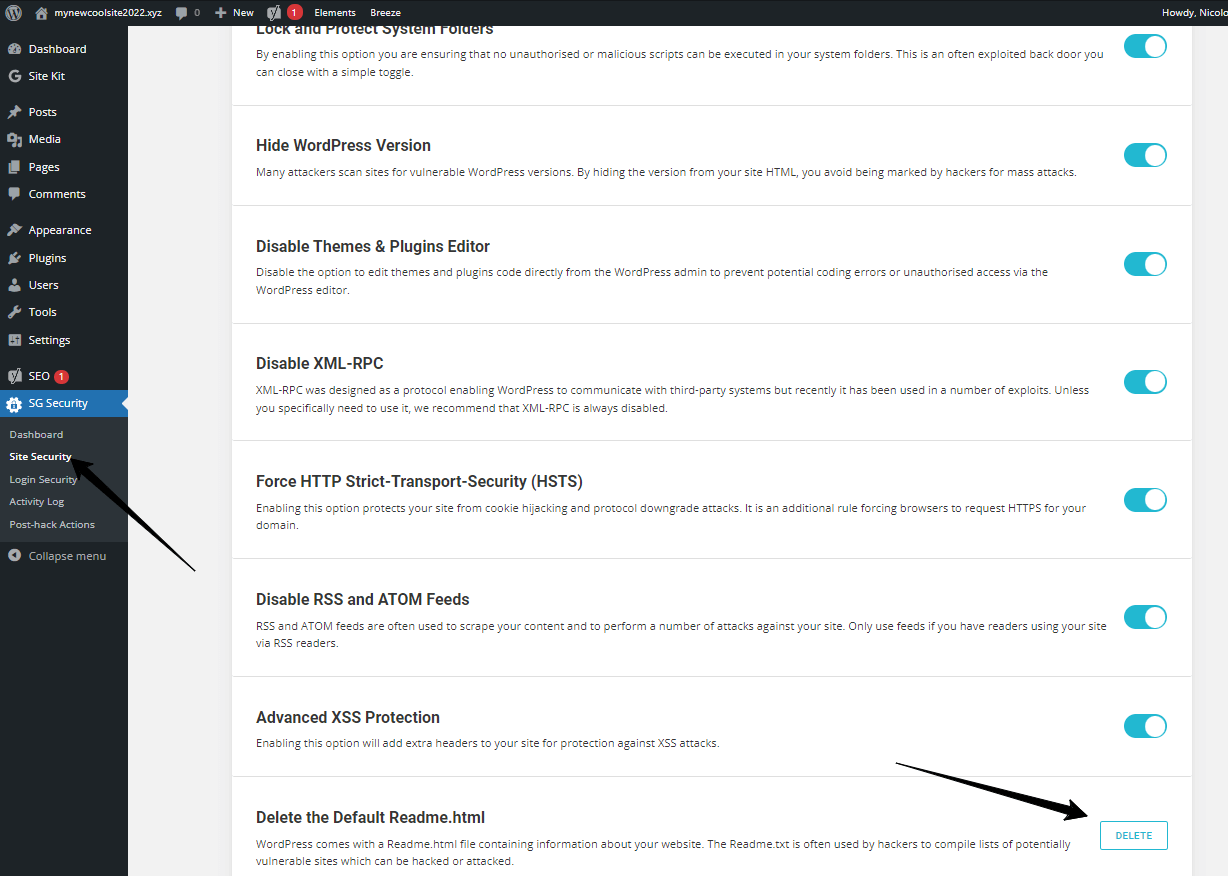
Siteground Security – An all-in-one plugin for security.
At Site Security, check all the boxes and make sure to click Delete the default readme.html
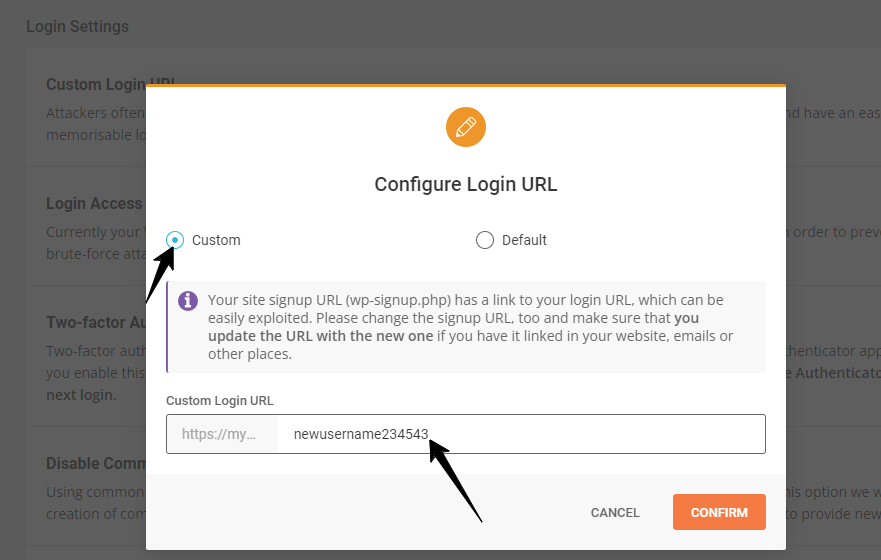
At Login security –> Set a Custom Login URL.
Your WordPress login URL by default is mywebsite.com/wp-admin.php
And, of course, the hackers know this. So this option comes to help.
You can change the Login URL to something like this: mywebsite.com/newusername234543
Write this down or bookmark the page because you don’t want to block yourself.
Health Check&Troubleshooting – It performs checks on WP to detect common configuration errors and known issues.
UpdraftPlus – A great plugin to back up or restore your site.
Redirection – It helps manage all 301 directs and monitors 404 errors.
Ad Inserter – It allows you to insert ads anywhere you want.
Create a Staging Site
When you make changes to your theme, you are affecting the live version of your site.
If your site receives traffic and generates income, you don’t want to ruin the current design as it creates a poor experience for your visitors.
That’s why we need to create a staging site. You can do whatever you want without affecting the live site.
It also helps in dealing with problems that arise as you work.
After you complete your work and everything is fine, you can push the changes you made in the staging site to the live site with one click.
Cloudways has this functionality built-in, and here’s how we can do it:
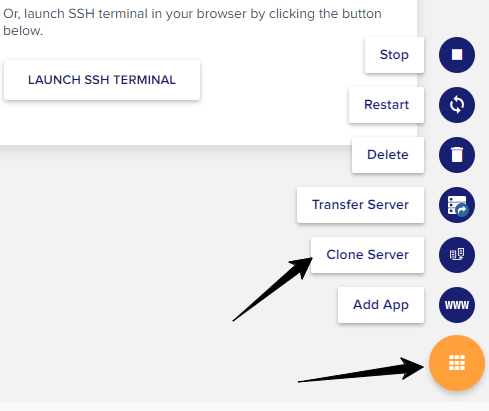
First, we log in to Cloudways and click the orange menu button on the bottom right, where you’ll see Clone Server.
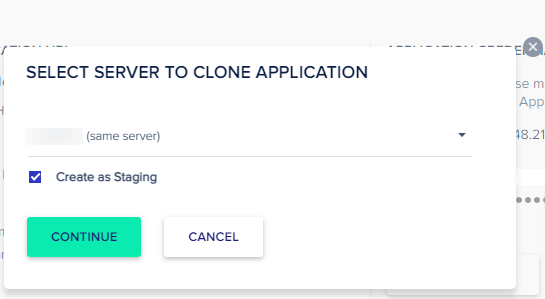
Select the same server you’re already using (so your staging site will be hosted on a fast server, and you’ll get better results) – For example, you can check how your changes affect the page speed.
Check the Create as Staging little box and Continue. It will take a few minutes.
NOTE: Once you create the staging site, don’t upload new content on the live site. Because once you push the staging site live, it will roll back your data to when you created the staging server.
Now, CW has provided the login details for the staging site.
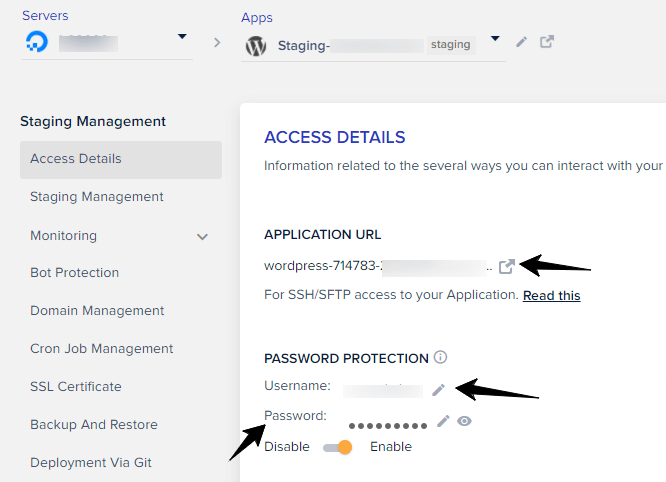
To access the WordPress Dashboard click the application URL of your staging site.
But make sure to add the URL extension we set up using Siteground Security.
For example, we click the staging URL and add our login extension…
wordpress-714783-2345754.cloudwaysapps.com/newusername234543
If you didn’t set up the SG Login security option, add wp-login.php after the Application URL.
If you can’t log in the first time, enter the username and password again. It’s a small error I encountered.
Now you can access the WP dashboard and make the necessary changes.
Once you are done and are happy with the changes… go to Staging Management and click Push.
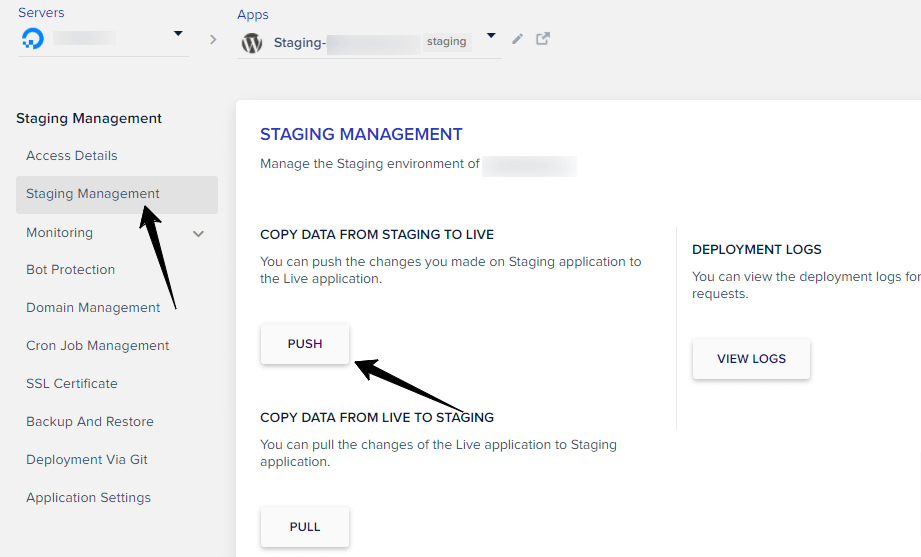
That’s it. All the modifications you made to your staging site are now pushed to your live site.
Questions and Answers
Why use WordPress?
WordPress, a CMS (content management system), is a user-friendly platform that helps you build websites and manage your content.
It is the most popular CMS.
WordPress runs 30% of websites.
It has +50,000 plugins that are free and will help you increase your performance.
What is web hosting?
Web hosting is a service that allows you to post your website on the internet.
Picture your site as a business; hosting is the rented office space.
A web hosting service provider is a business that offers the technology for your website to be viewed online.
Paid vs Free hosting
There are a lot of reputable hosting companies that offer their services for a small monthly fee.
On the other hand, you can also get hosting for free.
But there are some disadvantages:
Support – Sometimes, you’ll have lots of problems with your site. With free hosting, it’s not guaranteed you’ll get help from an expert.
Speed – How fast does your site load? Speed is a Google ranking factor. If your site takes forever to load, you’ll not rank well.
Advertising – The company can place ads on your site which may not be relevant to your article.
It’s restrictive – You don’t have many options regarding the ability to customize your site.
So, if you want a website that looks good, loads fast, and doesn’t give you a headache daily, you must choose a reliable hosting company.
What Are The Types of Hosting?
There are different types of hosting to make your website available on the web.
Shared Hosting
It’s the cheapest kind of hosting. Multiple sites share all the resources of the server.
But there are two main disadvantages:
It could be slower when your site gets busy because many other sites are waiting to be served.
And security issues created by the other websites you share the server with.
Dedicated Hosting
It’s more expensive, but it also gives you the most control over the environment where your site is hosted.
VPS Hosting
VPS stands for Virtual Private Server. With VPS, the server is divided into equal sections, and each site is placed within its own section.
These sections act independently of each other and are like a set of mini servers that all share the same hardware.
The main advantage is that other virtual servers can’t affect your machine’s performance negatively, and your installation is more secure.
Cloud Hosting
Cloud servers are, in general, VPS servers, but with the following differences:
– The size of your cloud server (RAM, CPU) can be enlarged or downsized dynamically.
For example, you could enlarge the instance during peak traffic times to keep up with the load. When traffic diminishes, you can downsize the instance again.
– Bigger instances always cost more money than small instances. Being able to change this dynamically can reduce your bills.